
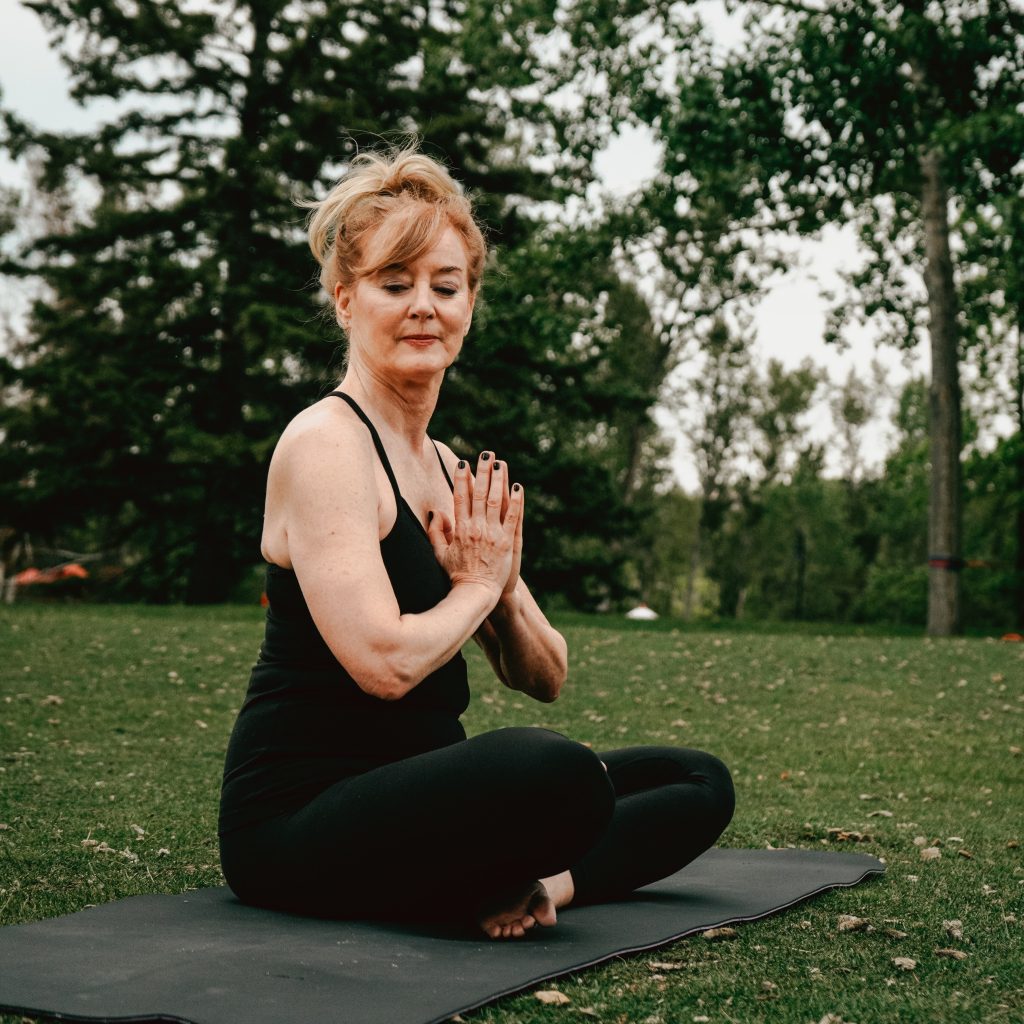
As a studio owner and yoga educator, one of my favorite things to do is take yoga classes when I am out of town. I love being anonymous and observing how different people do things, often picking up tips for my business back home. I recently went to a class labeled “all levels” and, within the class description, found words like “accessible” and “modifications taught.” I expected an “all levels” vinyasa class as described, where difficulty may be layered with strategic sequencing and thoughtful options and pose choices. Much to my dismay, halfway through the class, the instructor said, “Now go upside-down” without any other explanation. When the person next to me asked the instructor how to get upside down, the instructor told her to “just modify in child’s pose instead.” I have heard this very same instruction several times since this incident in classes, which studios market with the same misleading buzzwords.
Yes, yoga culture is changing. Movement is being looked at through a scientific lens, and we have started to question the way things have always been done. As a registered nurse of 12 years, this excites me. I love approaching movement from a complex, anti-one-size-fits-all attitude. When I go into a patient’s room, I assess that patient. They may have the same diagnosis as the person next door, but their symptoms and treatment plan are different. Nursing is holistic and individualized. What I have observed in the yoga community is the transition to a more broad scope practice. Yoga studios everywhere are advertising with phrases like “Yoga for EVERY body,” “modifications encouraged,” and “accessible yoga.”

When I see this, I ask myself, is a temperature of 105 degrees accessible? When I attend classes at some of these studios, do I actually SEE all body shapes? Or diversity at all for that matter? Is resting in child’s pose really an alternative to getting upside down?
The answer is NO. I believe that if we are throwing these words out there, we need to be able to back up what we say with well-informed teaching. In the US, the number of adults using yoga as a complement to healthcare increased from 9.5% in 2012 to 14.3% in 2017 according to the CDC [Center for Disease Control in the United States, editor’s note]. The 2016 survey conducted by Yoga Journal and Yoga Alliance shows that 14 million yoga practitioners are over the age of 50. Though age doesn’t at all suggest skill level and training, it does imply that we will see more diverse body types with more diverse injury histories. With more people finding yoga as a complement to healthcare and more older adults coming to yoga than ever before, we, as a community of yoga professionals, need to create an understanding of what “accessible” means.
Understanding how to make yoga accessible and how to modify poses comes down to education. If we are going to label something accessible, we must first understand what it is we are accessing, to begin with. This is a difficult task to accomplish in a 200hr training (trust me, I try). Take a commonly cued pose like Ardha Kapotasana, aka half-pigeon pose. The purpose of the pose depends on the goal of the teacher, but, in general, we are stretching glute max, external rotators, piriformis, etc. This pose requires deep hip flexion and external rotation of the front leg, deep knee flexion, and generally some ankle dorsiflexion along with spinal flexion.
If someone has a history of a bulging disc, they may be able to accomplish all the joint positions of the leg, but have trouble forward folding. Take another person who has a previous knee injury, and they may be able to deeply forward fold but are unable to support their weight in a closed chain stretch with the knee in deep flexion. The options they are given need to be different. And in both cases, child’s pose may exacerbate their existing injuries instead of helping them. Child’s pose is great to rest in during a sweaty vinyasa practice when you need a break, but when did it become a “modification”, a different version of an inversion?
I’m not saying every teacher in a public yoga class needs to be a physical therapist and understand the complexities of injury and bodies. But I do think we need to educate yoga teachers on the difference of giving someone an alternative, like legs up the wall when everyone else is “going upside down,” and simply bypassing the posture altogether. I believe we need to teach not only pose progressions in yoga teacher training, but also pose regressions.
I also suggest that we, as a community of yoga teachers and studio owners, begin to understand what accessible means. Accessible is synonymous with attainable. If we are going to use yoga to further help people and push yoga forward as a complement to healthcare, we must start with education — both of our students and our teachers.

As yoga teachers, we need to get better at saying, “I don’t know.” We have a limited range of knowledge, and we need to acknowledge when it’s best to refer a student to someone with more experience, including medical professionals. We need to be careful with buzzwords and marketing so that we do our best to get our students into the class that suits their goals, needs, and abilities. If we are going to label a class accessible or use of modifications, then we need to understand that giving students a pose such as child’s pose can leave the student feeling left out or less than. It also does nothing in furthering the students’ knowledge or breaking down the components of the pose so that one day, they can accomplish it. I believe in us as a community to do our best in helping our students through yoga. But despite how much I love it, child’s pose isn’t always the answer.
4 Tips for Teachers:
#1: When modifying, give students a shape that is similar to the one you are cueing.
Critically think about it. One thing that helps me is looking at a picture of the pose on my phone and turning it sideways, upside down, lying it flat. What shape does it make then? For example, Vasisthasana II (aka side plank with top leg extended and bound) is also Utthita Hasta Padangusthasana (extended hand-to-big-toe pose). Flip that one its side, it’s Trikonasana (triangle), lay the picture flat and it’s Supta Padangusthasana (reclining hand-to-big-toe pose). This also will help you learn shape similarity when sequencing classes.
#2: When cueing poses, start with the regressed version of the pose.
And then cue to more difficult, not the other way around. Cueing the peak variation of the pose first and then saying, “if you can’t do x, do y instead,” isn’t inclusive. It can make students feel less than and give them an unsavory experience of your class.
#3: Use progressive sequencing techniques.
Make poses familiar to the students by starting with pose regressions and then progressively sequencing to more difficult poses. Pose familiarity and progressive sequencing is an inclusive way to teach. When you cue similar shapes in your sequences, it gives all levels of students something to bite into and also denotes equal importance to each pose adaptation. For example, cueing Svarga Dvijasana (Bird of Paradise)? Your sequencing before could include triangle, bound extended side angle, Utthita Hasta Padangusthasana, etc. These poses are similar in shape and can also be used to modify bird of paradise.
#4: Plan ahead, zoom out, and look at your sequencing objectively.
What may be challenging? What might students of varying abilities and body types have difficulty with? What poses have complicated joint positions? What transitions are less familiar or more demanding? Plan options for these poses and teach them to the whole class at the beginning of your sequence. Use that as the rubric for your class and then progress the pose/sequence from there. Some students may be too intimidated or shy to ask for help with the hard stuff so intuit what variation these students will need and teach them to everybody. Teaching it to the entire class from the start saves you time later when you cue the more challenging version and also makes modifying easily available when it is time to teach the progressed variations of it. This is not only smart sequencing for students of all skill levels, but also an inclusive way to plan your classes.
3 Studio Owner Tips:
#1: Give your teachers a list of options for more difficult poses.
Educate them on inclusive language and intelligent sequencing. Celebrate them when they do this well.
#2: Pair marketing with teaching reality.
If you use words like “accessible” and “modifications given” in your marketing of a class style, make sure the teachers leading the class have adequate education in HOW to do these things.
#3: If you have a challenging or an advanced class on the schedule, don’t be scared to own it!
Label it as advanced and put a minimum practice requirement to take it in the description. We can teach the hard stuff and market directly to that clientele. If you can get students to the right kind of class, with an instructor that is trained well, your community will be happy and ultimately learn and progress in their practice.
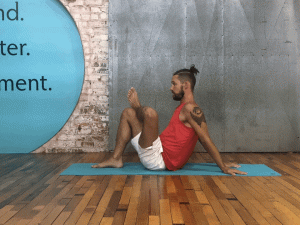
Present Options: 5 Poses to Teach According to Progression
Side Plank

Start with knee down and top foot grounded, progress to lifting leg. Next try side plank with the top foot grounded down, in line with the pelvis on the mat. Then full side plank. Option to use a strap to extend the top leg toward the sky. Stop at any point or alternate between any of these options.
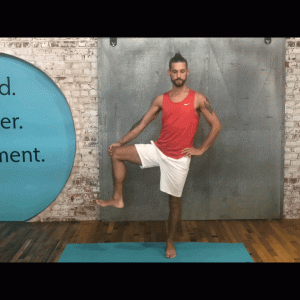
Pigeon Pose
Pigeon Pose can be super difficult for many people, for variations, try a figure four stretch on the ground, with your hands behind you and reaching your chest toward your shin. To progress that, lay on your back and interlace your hands around your thigh and gently pull it toward you as you drive the knee in the opposite direction.
Inversions
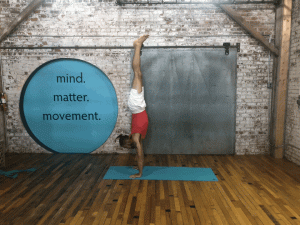
Don’t “just go upside down”. If handstand is what you’re working toward, try pincha mayurasana first. If that seems crazy to you like it does to the rest of the world, use dolphin or down dog. Both inversions and both will require a certain amount of shoulder girdle strength that will make inversions easier down the road.
Utthita Hasta Padangusthasana
Start simply holding the shin and opening the leg out to the side. If you wish to continue, extend the leg. Next try extended the leg with a strap. If you can reach the toes, try extending the opposite arm out for balance. Just like in Side Plank, use any of these variations to make this pose accessible.
Bird of Paradise Bind

Progressively stage your pose choice, stopping at any point. First Triangle with hand on shin, then progress to hand on block, next into extended side angle. Then use a strap for the bind behind the back. These poses will prepare you for bird of paradise, but they also can be used as a options instead.
Editor’s note: In an attempt to make our language more inclusive, we’ve used the words “modifications,” “variations,” and “options” interchangeably in this article, while understanding that “options” holds the idea of accessibility best as it does not present a pose as a norm to derive from. For more information, please read our How to Use Language to Make Classes More Inclusive article by Carly Stong.
Edited by Ely Bakouche
Progression animations by author
Enjoyed reading this article? Consider supporting us on Patreon or making a one-time donation. As little as $2 will allow us to publish many more amazing articles about yoga and mindfulness.